A Short History of Learning by Demonstration, from Workshops to Online Courses
Learning by demonstration history shows how workshops, classrooms and recordings make skilled actions visible, helping you choose a format that suits the task.
A baker folds dough while a novice watches from the other side of the bench. The novice reaches for the flour with more confidence than coordination. That small gap between seeing and doing is the subject of learning by demonstration history: how teaching has made skilled actions visible, from shared workspaces to recorded lessons.
There is no single, tidy progression from apprenticeship to online instruction. This account is a broad comparison of teaching formats, not a claim that one replaced another everywhere. Each offers a different view of the work, and each leaves something for the learner to discover by trying.
Apprenticeship placed the learner beside the work
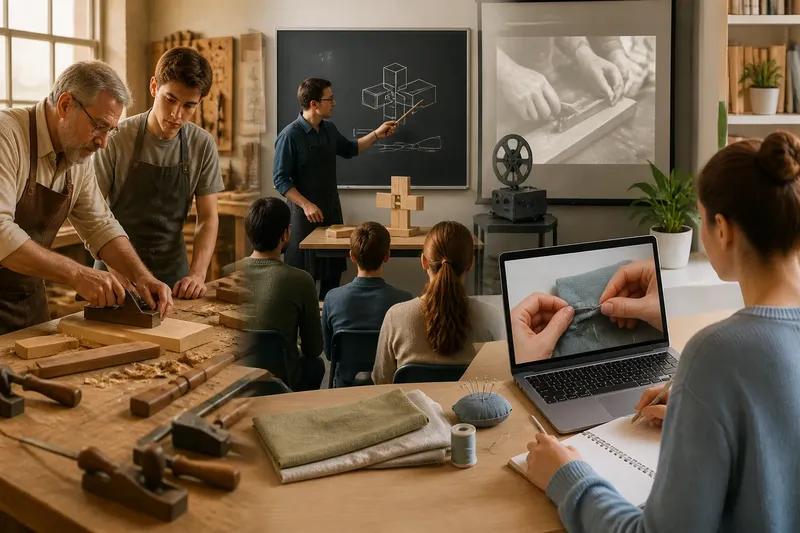
In apprenticeship, learners could watch skilled workers in the places where a task was actually done. A cabinetmaker might select a plane, position the wood and adjust pressure as the grain changed. The learner saw the tool, material and consequences together, rather than as separate illustrations.
Being nearby could make it easier to ask why the worker paused or changed direction. It could also make the view worse: a learner might stand behind someone, miss a small movement or hear only part of an explanation. Familiar actions were not always explained aloud. Watching was an opportunity, not a complete account of the craft.
The format’s defining feature was proximity. The learner could see work as it unfolded and, where the worker allowed it, try the task in the same setting.
Classroom demonstrations made one model visible to a group
Teaching in classrooms brought demonstrations to groups rather than keeping them beside an individual worker. A teacher could draw a technique on a board, show a model or perform a procedure at a bench. Film later offered another way to bring a workshop or process into the classroom, without moving the work itself.
These are broad changes in format, not a dated timeline of universal adoption. Their practical difference is easier to describe than their chronology: a diagram can clarify a relationship, a live object can show how material responds to handling, and a film can give a group a shared view of a process.
Group instruction also created a familiar problem. Learners at the back might not see a fine movement, while a teacher could not attend to every learner’s attempt at once. A model worked better when it was followed by a chance to practise and receive a correction.
Recorded video gave learners control over pace and view
Recorded video changed when and how a learner could watch. Unlike a live demonstration, a recording can be paused and replayed; a close-up can show hands or a small screen control more clearly than a distant seat might. Film and video can also carry a demonstration beyond the room where it was made.
The camera makes some details available and hides others. A wide shot can show where materials sit, while a close view can clarify grip or tool position. Captions and spoken explanation can name why an action matters. Editing may remove pauses and corrections, however, leaving a clean sequence that makes skilled work look less uncertain than practice tends to feel.
A recording cannot inspect a learner’s attempt or respond to a changed interface, an awkward grip or an unexpected material. Replay helps with the model; it does not provide individual feedback.
Online lessons pair a model with an attempt
An online course can put a short demonstration beside a prompt to try the action. A drawing lesson might show light guide lines before asking the learner to sketch a different object. A software lesson might demonstrate a command and offer a practice file. The useful prompt directs attention to a particular cue: hand position, action order, pressure or a change in the material.
Say a learner has a scrap of cloth, a needle, thread and a hem that still needs turning. They watch a lesson showing how to fold a narrow edge, pin it and stitch close to the fold. They try those actions, notice that their seam wanders, then replay the close-up and compare where their fingers hold the cloth. The resulting decision is concrete: if the fold is hard to keep aligned, they can slow down and pin it again; if the fold holds but the stitches drift, they can focus on needle placement. The example does not promise mastery. It shows how a visible cue can guide the next attempt.
Choose a demonstration format by the kind of help you need
Before choosing a lesson, check what the format lets you see and do. For each observation, use the decision that follows rather than assuming that a longer recording or a live session is automatically better.
- Check whether the camera or teacher shows the movement that affects the result; if it is hidden, choose a closer view or a demonstration at the workbench.
- Check whether the task depends on a material or tool you have; if yours behaves differently, seek a model using a comparable material or ask how the difference changes the action.
- Check whether you can pause or replay a difficult sequence; if you cannot, choose a live session where you can ask for a repeat or take notes on the action order.
- Check whether the lesson names why each important action is taken; if it only shows a sequence, look for an explanation before copying it.
- Check whether you can try the task and compare a visible feature with the model; if practice is not included, find a way to make an attempt and inspect that feature.
- Check whether the instructor can respond to your particular difficulty; if your attempt needs diagnosis, choose a live teacher or another source of individual feedback instead of relying on replay alone.
For a small action that needs repeated viewing, a recording may suit the task. For a mistake that needs someone to inspect your attempt, a responsive teacher may matter more than playback control.
Which demonstration format suits a learner’s question?
Is a live demonstration better than a recording?
A live demonstration can respond to a learner’s immediate question and show an action again on request. A recording gives control over pace and replay, but cannot diagnose an individual attempt.
Why show the process as well as the finished result?
The finished result does not reveal the action order, tool handling or corrections that produced it. A view of the process gives the learner something specific to interpret and try.
What should a learner watch for?
Choose a cue that affects the result, such as grip, order, pressure or a change in the material. Trying to notice every movement at once is an efficient way to remember none of them.
How can a learner judge whether the demonstration helped?
Compare one visible feature of the attempt with the model, such as tool position or action order. If the difference is hard to see, seek a closer view or a more specific explanation before repeating the same approach.
Learning by demonstration history is also a history of changing access
Workshops, classrooms and recordings offer different kinds of access, not a simple ranking. A workshop can place the learner near the materials; a classroom can make one explanation available to a group; video can make a sequence easier to revisit. Each format can still leave a learner with an obscured view, an unanswered question or too little feedback.
For learning by demonstration history, the useful thread is how each setting shapes what a learner can see, repeat and question. When choosing a lesson, look for the action you would otherwise have to guess, and check whether the format lets you practise it. A clear view of that action is often more useful than a longer video with a more impressive title.